
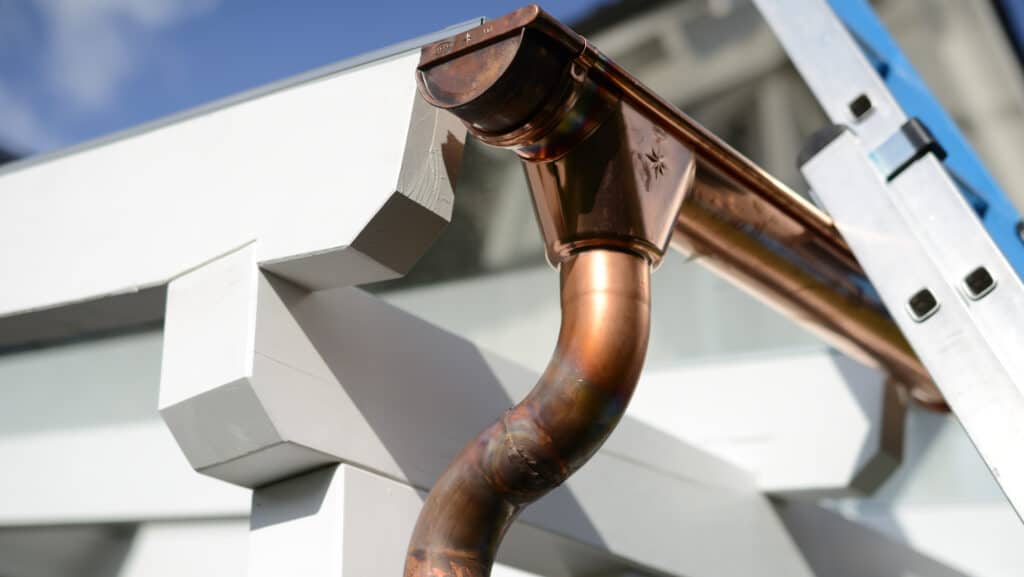
Adding copper gutters to your home isn’t just a functional move—it’s also a stylish one. Copper gutters not only provide crucial protection against water damage but also enhance the aesthetic appeal of your property, giving it a unique, antique charm. This guide will give you a detailed walkthrough on how to correctly install copper gutters to maximize their utility and ensure an attractive look. However, it’s crucial to note that professional intervention or advice is an absolute necessity to achieve an ideal outcome.
The Unmatched Appeal of Copper Gutters
Why are copper gutters gaining so much popularity among homeowners these days? The answer lies in their unique blend of strength, stunning looks, and practical utility. Below, we delve into the various reasons why copper gutters might just be the perfect addition to your home:
- Remarkable Longevity: One of the most significant advantages of copper gutters is their impressive lifespan. With proper care, copper gutters can easily last up to a full century, making them a highly cost-effective choice in the long run, despite a relatively high upfront cost.
- Stunning Visual Impact: Over time, copper gutters naturally develop a gorgeous patina—a kind of antique finish – that adds a classic charm to any structure. This characteristic of copper gutters only enhances their visual appeal over time, so they look better as the years go by.
- Practical Functionality: Copper gutters are more than just visually pleasing; they’re also tremendously functional. They work exceptionally well at channeling rainwater away from your infrastructure, preventing water damage from undermining your home’s structural integrity. They’re particularly effective in areas that regularly experience heavy rainfall.
Preparation Stage: Gathering Necessary Materials and Tools
Before you kick off the gutter installation process, it’s vital to ensure you have all the necessary materials and implements you’ll need:
- Copper gutter sections
- End caps and corner pieces
- Copper gutter hangers
- Downspouts and elbows
- Rivets and rivet gun
- Copper gutter sealant
- Measuring tape
- Level
- Ladder
- Screwdriver
- Hacksaw
- Tin snips
- Essential safety gear, including heavy-duty gloves and safety goggles
Detailed Installation Guide
Now that we have all the necessary materials and tools ready, let’s start with the installation process. Here is a sequential guide to installing copper gutters:
- Detailed Measurements and Thorough Planning: Begin by taking precise measurements of the entire roofline where the installation is intended. Special attention must be given to corners, downspout locations, and other potential problem areas. This preparatory step is paramount in achieving a successful installation of copper gutters.
- Selecting the Ideal Gutter Profile: Copper gutters are available in various profiles, like K-style and half-round. Choose the one that best complements your home’s architectural design.
- Accurate Cutting and Assembling on Ground Level: Utilize a dependable hacksaw or tin snips to cut the copper gutter sections to the required lengths. Begin assembling the gutter sections on the ground, using the end caps and corner pieces as needed.
- Mounting the Gutters: Affix the copper gutter hangers to your home’s fascia, maintaining the spacing as per the manufacturer’s guidelines. Attach the gutter sections to these hangers, maintaining a slight gradient towards the downspouts for a smooth water flow.
- Sealing the Joints for Water-Resistance: Once the gutters are in place, apply the copper gutter sealant to all joints and seams, forming a water-resistant barrier against leaks. This step is crucial to maintain the effectiveness of your gutter system.
- Attaching Downspouts and Elbows: Establish connections between the downspouts and the gutter outlets. Use elbows to direct the water flow as required, ensuring that the downspouts channel rainwater away from your home’s foundation to prevent soil erosion and basement flooding.
- Securing the Setup: Employ copper rivets and a quality rivet gun to secure the gutter sections and hangers, ensuring they can withstand the weight of collected rainwater and potential debris.
- Regular Inspection and Maintenance: After completing the installation, thoroughly inspect your copper gutters for any loose components or signs of potential leakage. Regular inspection and timely maintenance will ensure the longevity of your gutters and maintain the exquisite look of the copper.

Consider Hiring a Local Roofing Contractor
Although this guide offers a basic overview of copper gutter installation, it’s vital to understand the importance of hiring a professional for this task. Here’s why:
- Unmatched Expertise: Skilled professionals possess the knowledge and experience to install your copper gutters in a manner that ensures longevity and optimal functionality. They can predict potential challenges and provide effective solutions that might not be apparent to a DIY enthusiast.
- Safety Measures: The process of gutter installation involves working at height, which can potentially be hazardous. Professionals are equipped with necessary safety gear and training to minimize risks and prevent any mishaps.
- Warranty Provisions: A lot of copper gutter manufacturers provide warranties that hold valid only when the gutters are installed by a professional. So, hiring a professional guarantees that your investment is well protected.
- Efficiency: Professionals generally complete the installation quicker and more smoothly than a DIY enthusiast, saving you considerable time and effort in the process.
Maintenance Tips Post Gutter Installation
After your copper gutters have been properly installed, they require minimal but regular maintenance to stay in top condition. Here are a few important tips to remember:
- Periodical Cleaning: Make sure you clean your gutters at least twice a year to remove leaves, debris, and dirt that can obstruct the upward water flow.
- Preventing Blockages: Consider installing gutter guards to prevent debris from entering and clogging your gutters. This step reduces the need for frequent cleaning and assures optimal functioning of your gutters.
- Regular Damage Inspection: Frequently check your gutters for signs of damage or leaks. Address any issues as soon as they are detected to prevent significant water damage to your home.
- Regular Sealant Maintenance: The sealant used during the installation might degrade over time. Regularly check for any cracks or gaps in the sealant and reapply as necessary.
- Ensuring Downspout Maintenance: Make sure your downspouts are not obstructed and are directing water away from your home’s foundation as designed.
Conclusion
Truly, copper gutters offer an exclusive blend of durability, aesthetic appeal, and functionality, making them an ideal choice for homeowners wanting to safeguard their homes while also enhancing their exteriors. Though the gutter installation process can be taken up by a dedicated DIY enthusiast, it’s generally recommended to involve a professional roofing company. Their expertise, adequate safety measures, and efficient working mechanisms make the investment in professional installation worthwhile. With proper installation, maintenance, and care, copper gutters can last several decades, offering practical functionality and timeless beauty to your home.